.jpg)
Photo editing takes time, skill, and attention to detail. Some photos can be edited in less than 10 minutes, while others can take up to an hour.
If you’re editing for a brand, it’s more than likely that you’ll be editing more than one photo. This can take even more time because now you need to edit photos to fit a brand’s style and image.
Without a dedicated editing team, scaling content campaigns can be an issue. The simple solution to this issue is to batch edit photos. Here’s why every brand needs it.
There’s a lot of editing involved in content campaigns, marketing, or product photography. The main challenge here is keeping a consistent style or theme across all photos.
Doing so allows for excellent brand association. This is when brands highlight or focus on specific color schemes, pallets, fonts, and several other factors that make it memorable.
But what’s most important is applying the same style and aesthetic across the board. Batch editing photos allows this and more. Using this strategy allows you to:
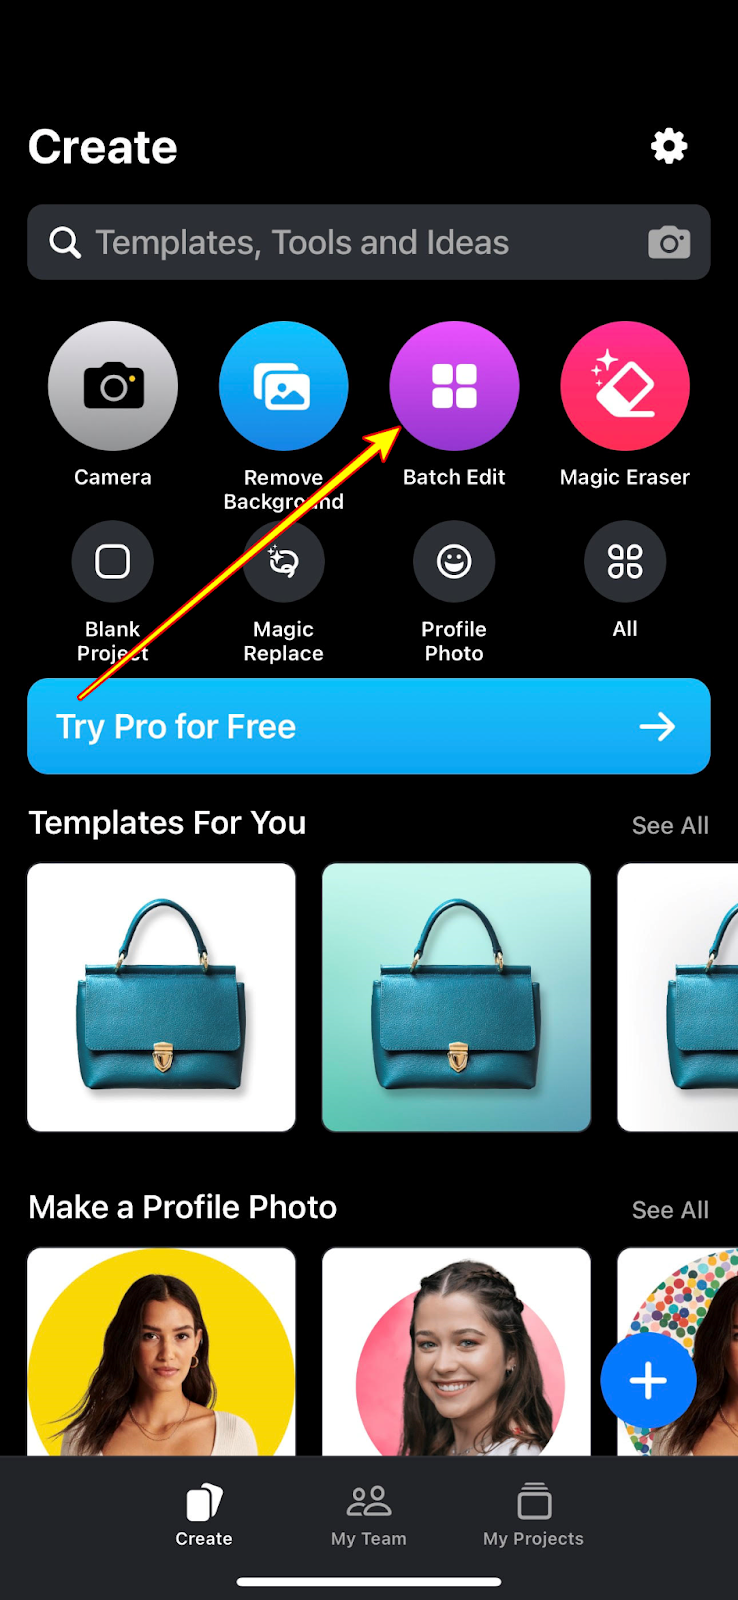
If you want a free, intuitive, and beginner-friendly editing tool for batch editing photos, Pixelcut is something you should try. It’s available for iOS, Android, and even desktops.
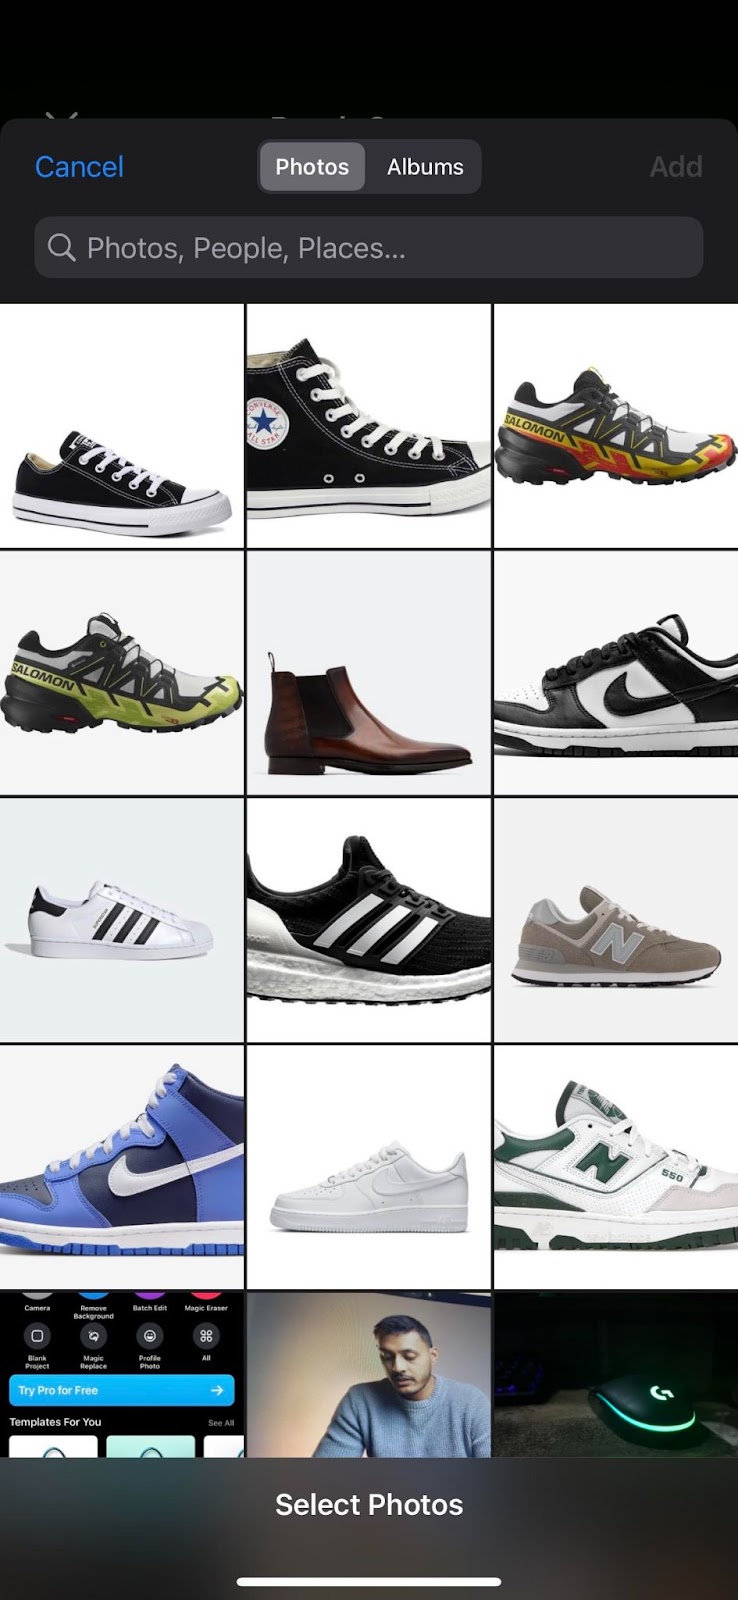
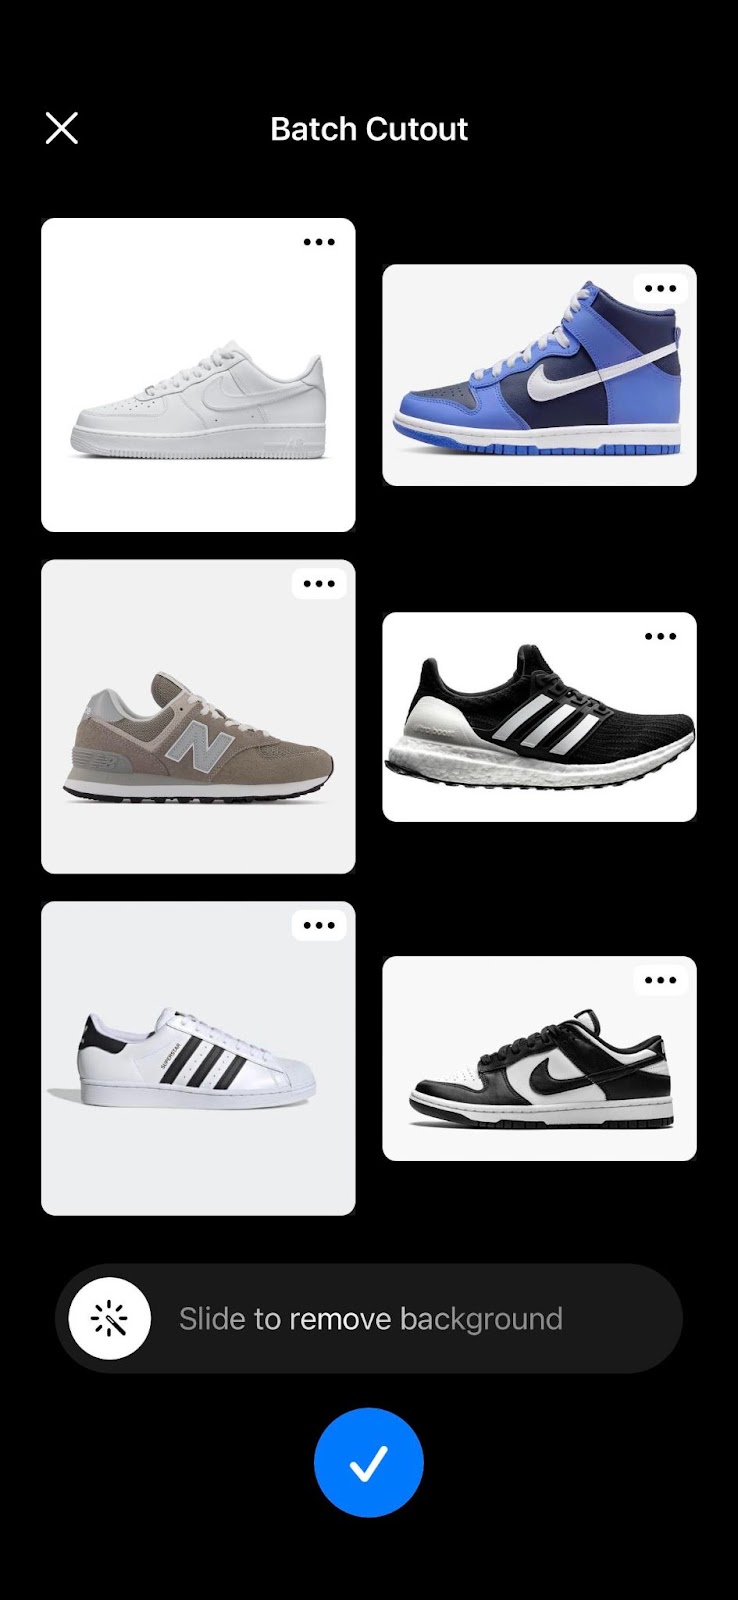
Here’s a quick step-by-step guide on how to batch edit photos using Pixelcut:
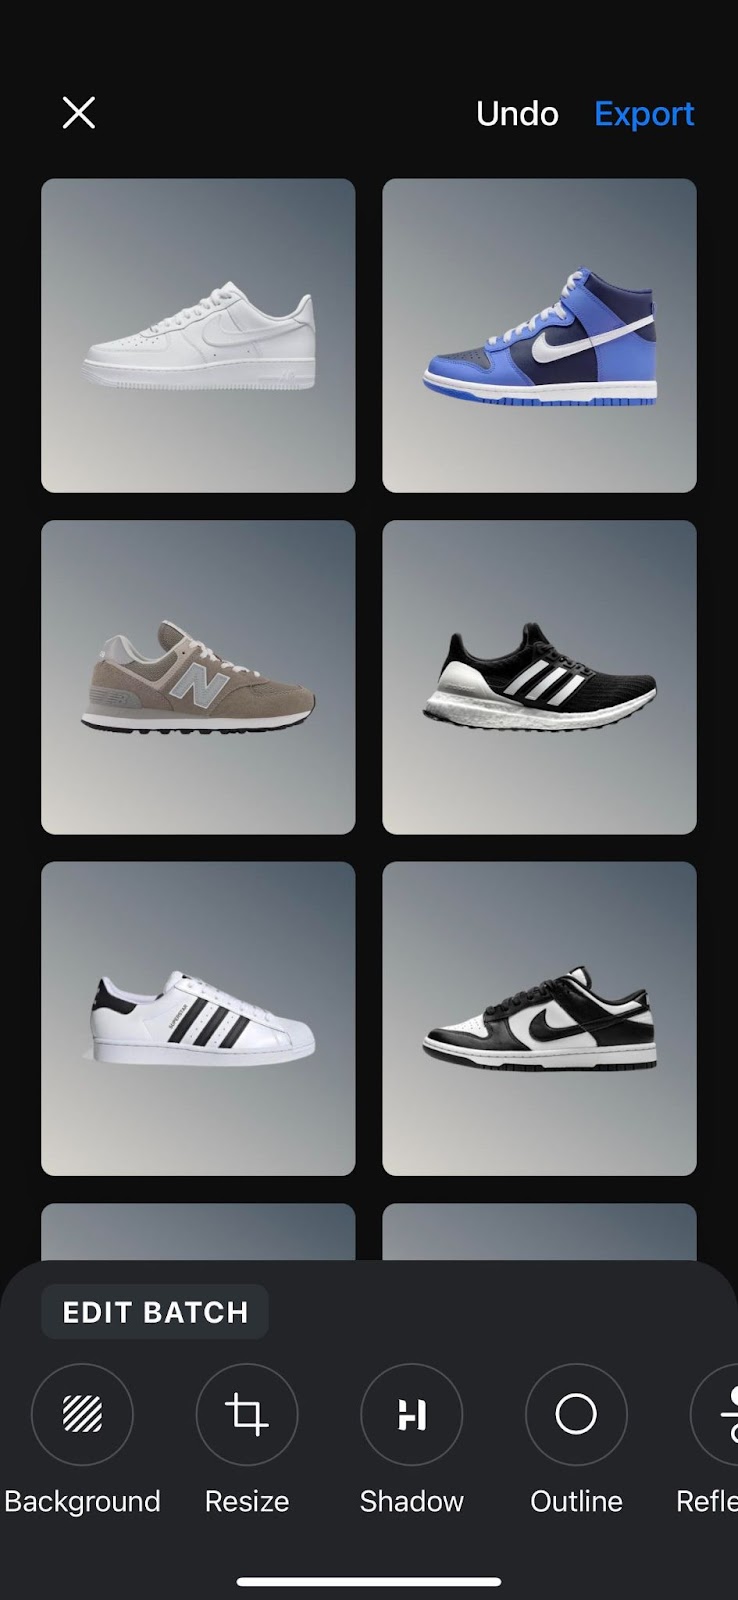
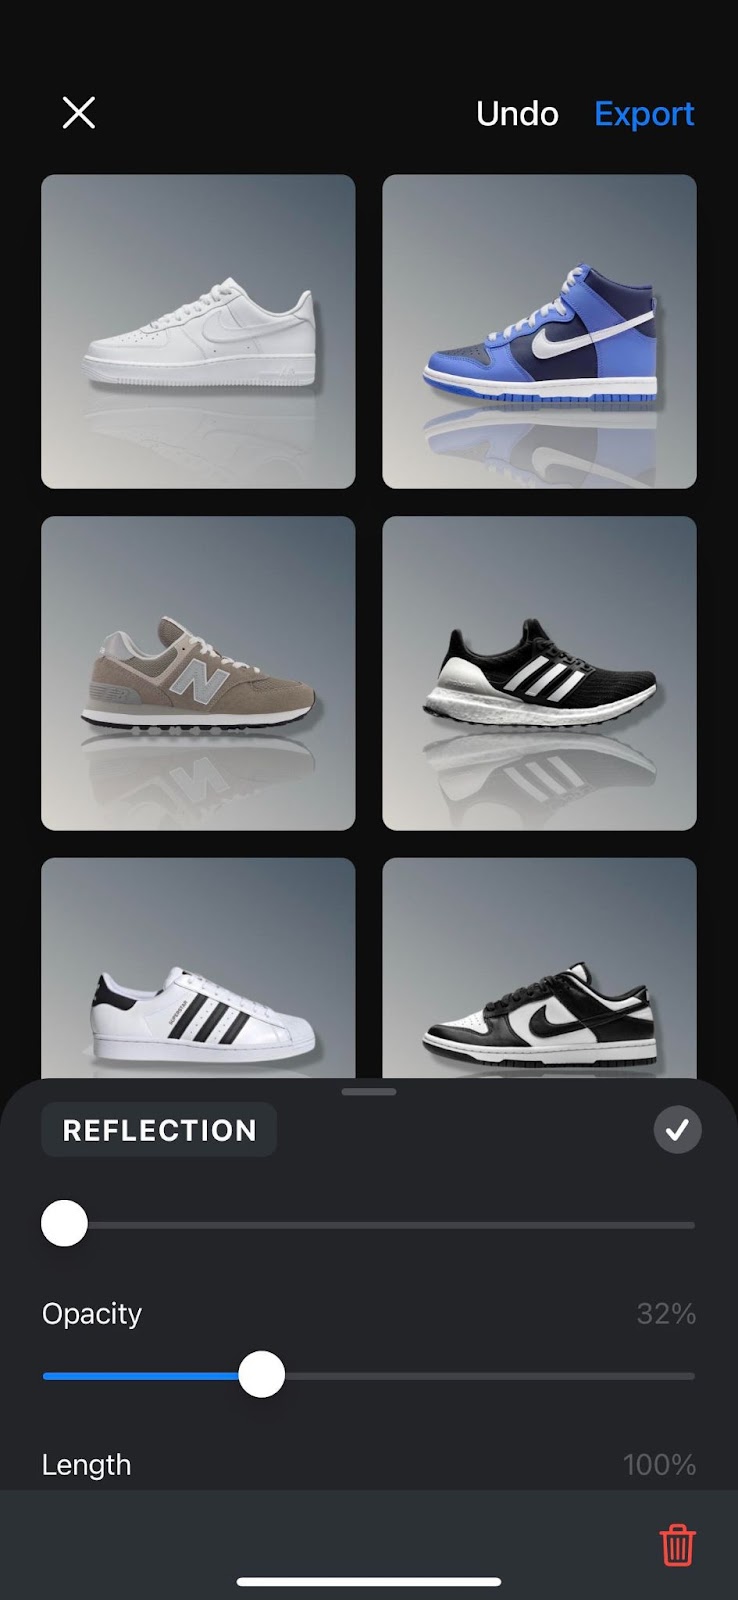
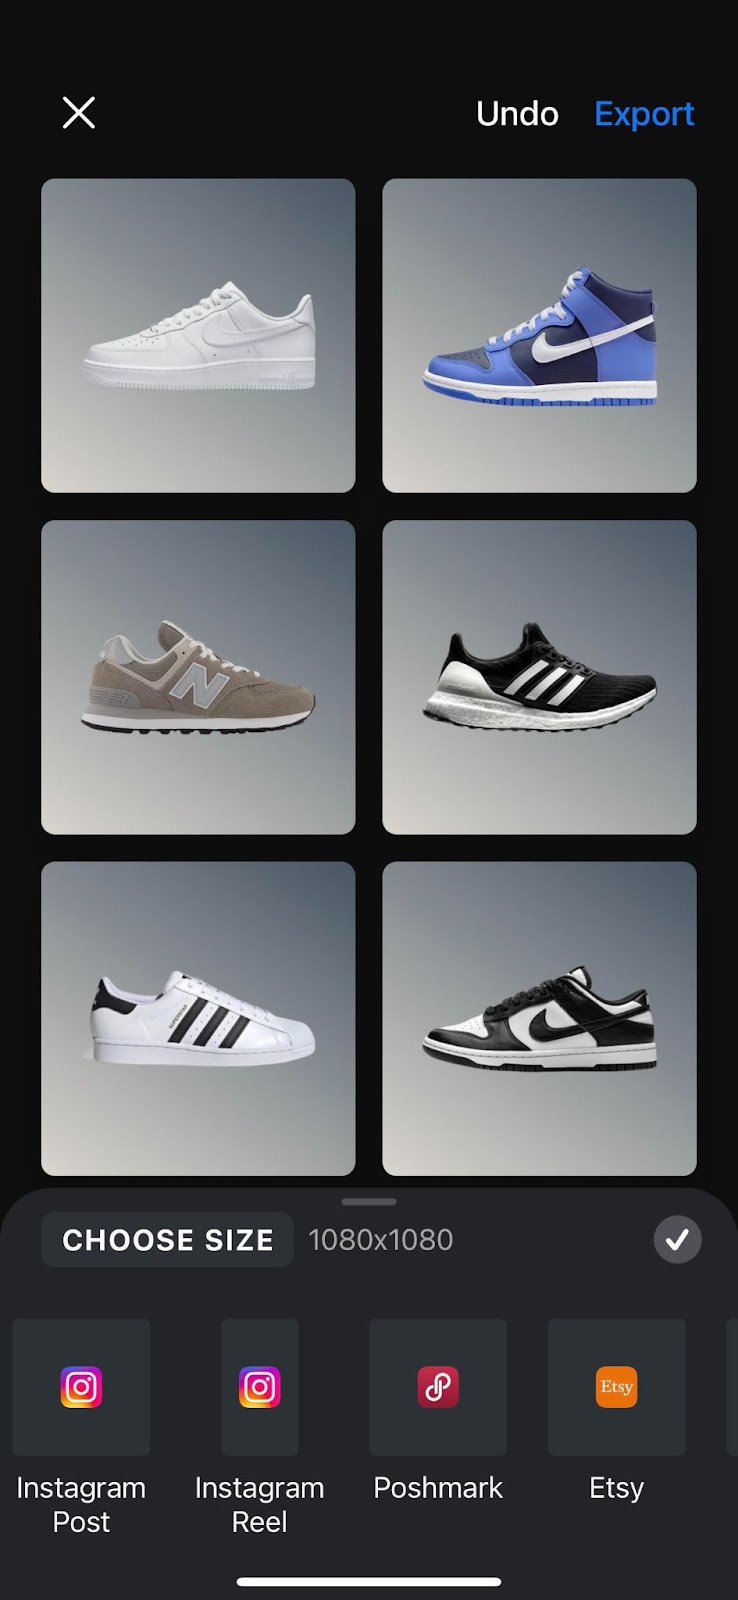
All that’s left to do is to export the images and they’ll be ready for upload! To make things even easier, you can even change the size to fit specific platforms like Instagram and even Shopify!
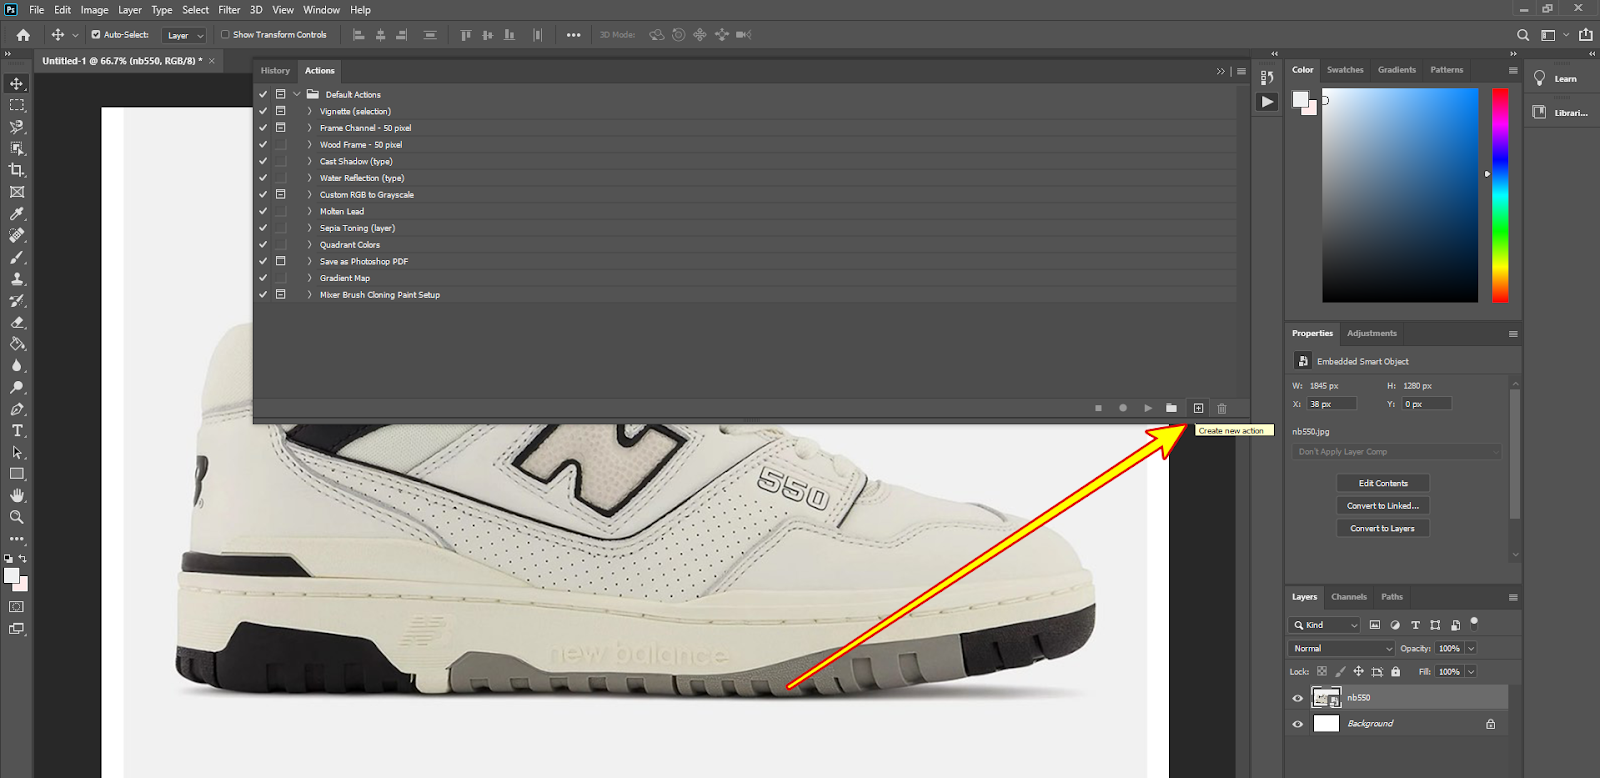
Photoshop is arguably one of the best photo editing tools out there. The issue is, it takes a lot of time to figure out. If you’re new to editing, you can always find videos on YouTube.
But, to achieve what we did with Pixelcut, we probably have to watch a new tutorial video for each step that we took. Here’s a tutorial on how to do it with Photoshop:
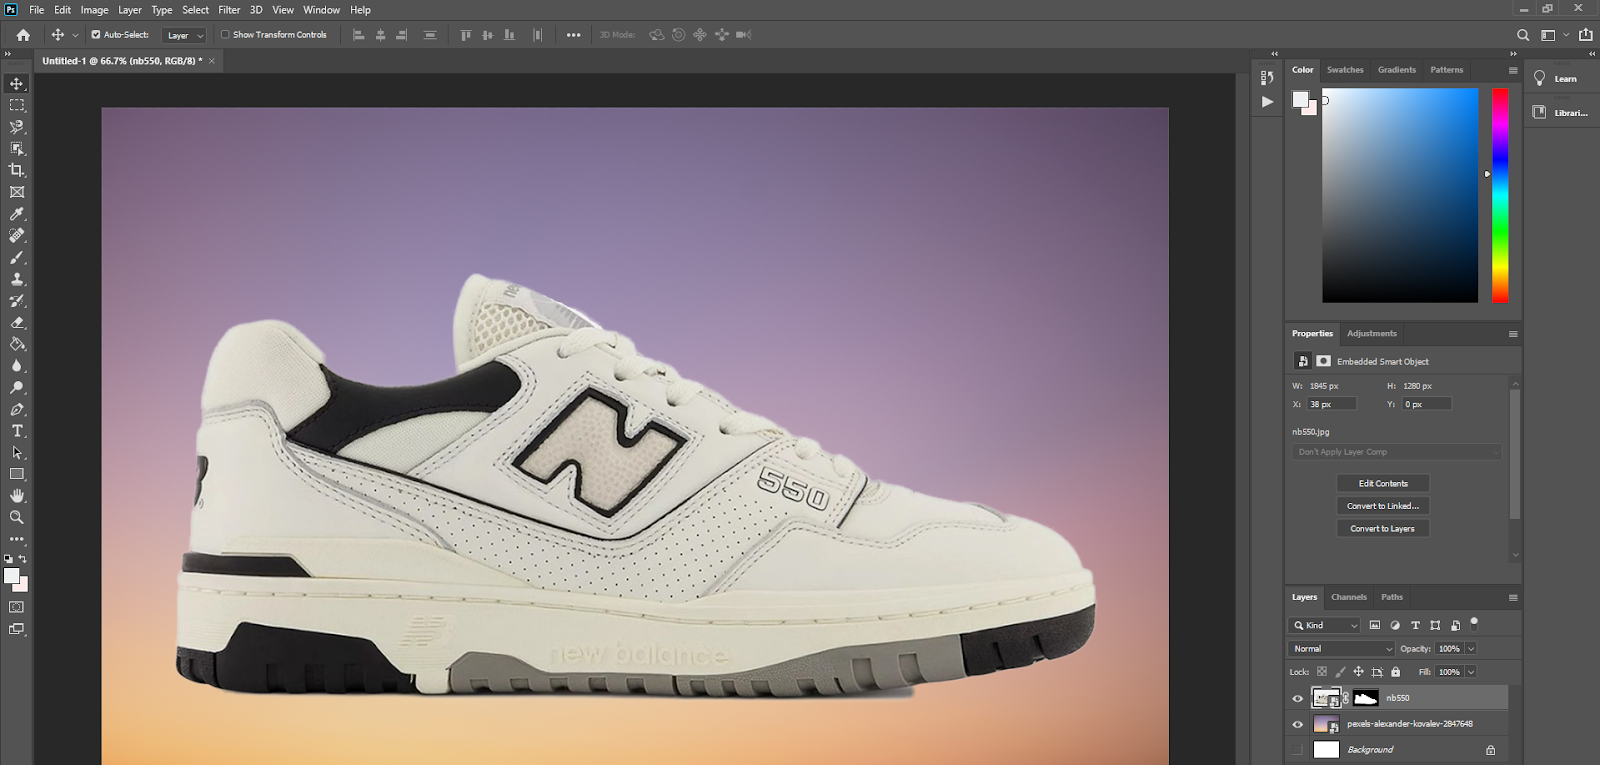
Let’s say you finished a couple of tutorials on the best ways to remove backgrounds (There are tons of great ones out there!). The next thing we should do is add a background.
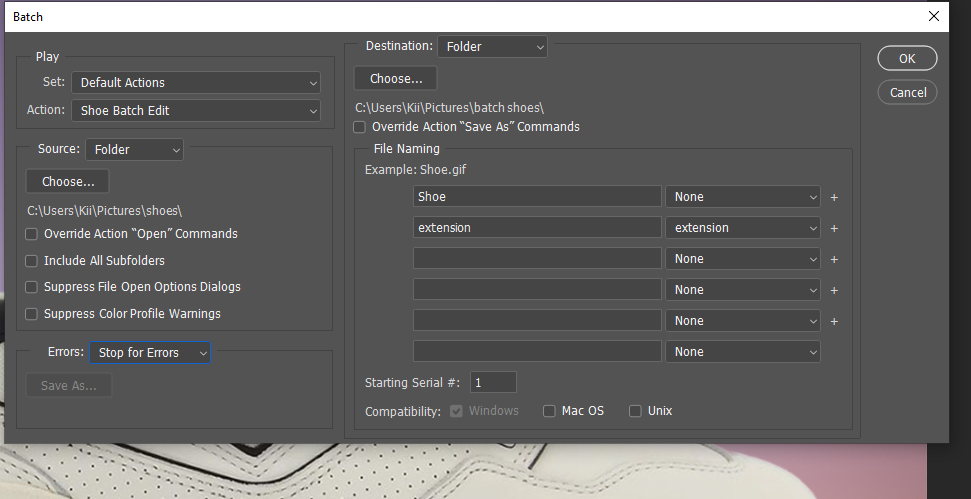
Once you’re happy with the edit, export the photo and go back to the “Actions” menu and stop recording. Now, here’s how you can apply the action recording to other photos.
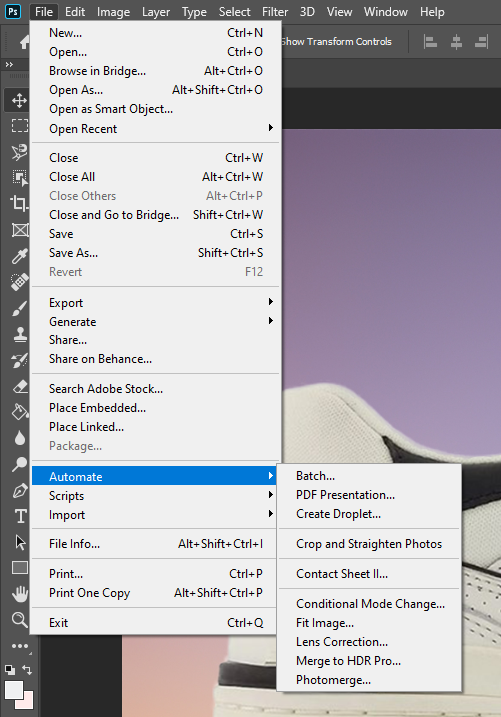
To help you automatically batch remove the background from each photo with Photoshop, you need to download a script. But as a rule of thumb, be careful of what you’re downloading online.
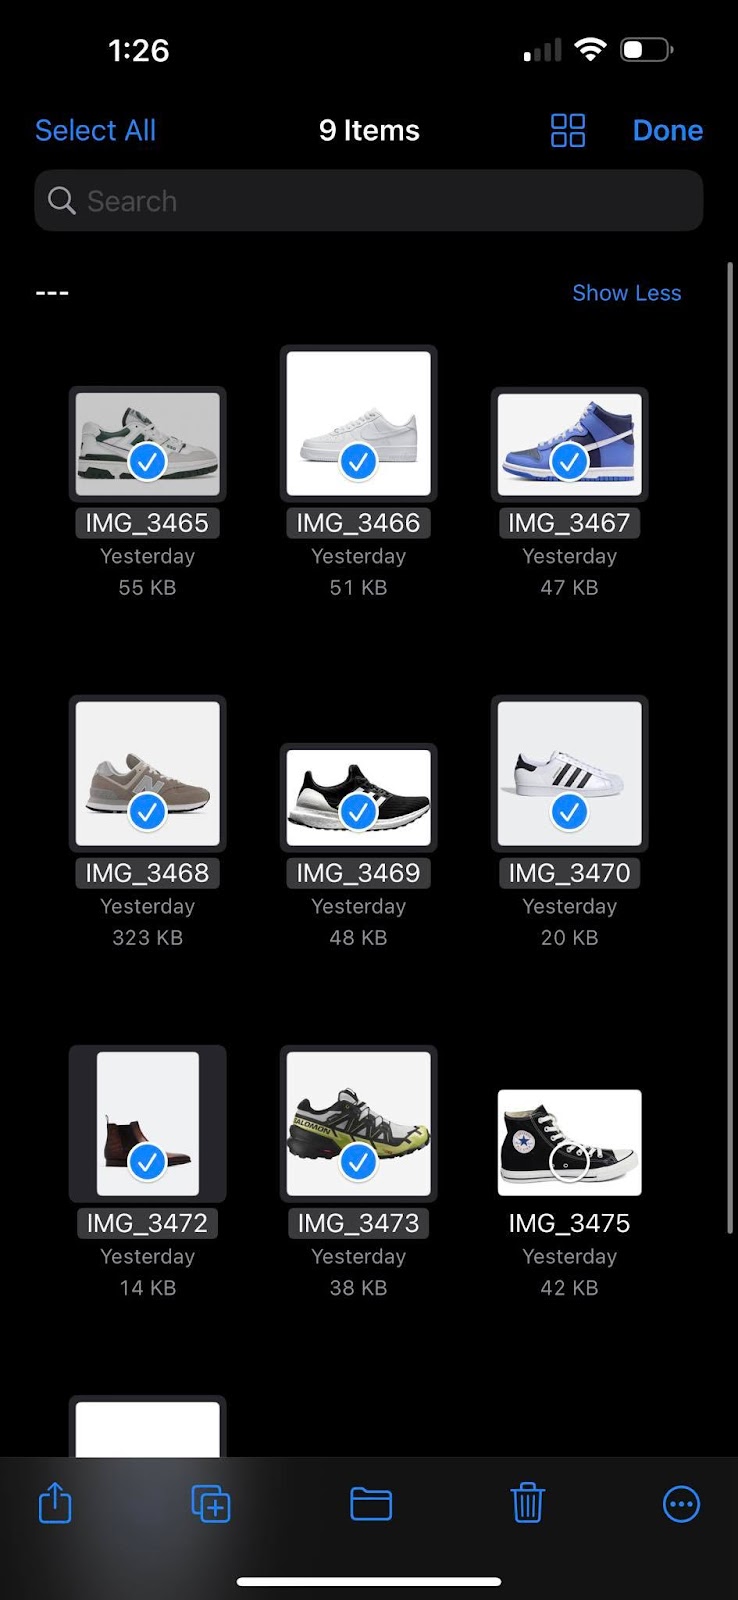
Batch editing on iOS is a breeze. All you need to do is to select a photo. Then, click on edit, do the editing you need, and click on “Copy Edits”. Afterward, you can select the photos you want to edit and click on “Paste Edits”.
However, if you want to remove the background from these photos, it takes a couple of extra steps. Removing the background from one photo is easy enough, all it takes is a long tap and you’re done.
But, to batch remove the background using iOS, you first need to:

The main issue here is the background remover isn’t that good. Here’s an example photo:
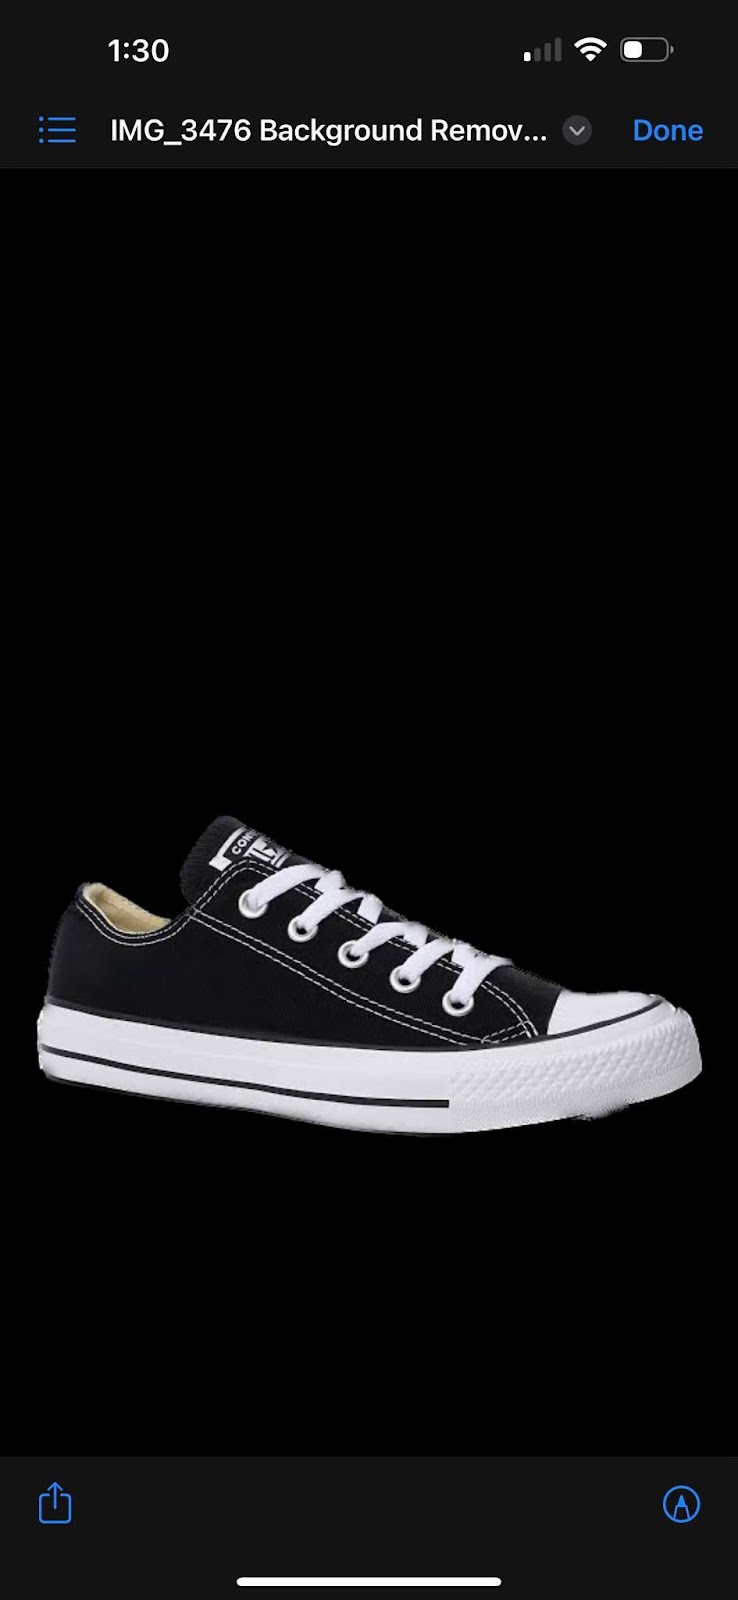
Key areas of the shoes are missing, there are rough edges everywhere, and there’s no convenient way to automate adding backgrounds.
Unlike Photoshop and Pixelcut, there’s no option to fine tune the background remover. Plus, if you want to edit more, you need to go back to the “Photos” app and do it from there.
Batch editing photos saves you time, energy, and helps optimize the flow of any content campaign. So, before you start editing consider the following:
If you want a simple and effective way to batch edit your photos, Pixelcut has got you covered from background removal to adding details like shadows or reflections. Try Pixelcut for free today!
Join more than 10 million small businesses, creators and entrepreneurs that use Pixelcut to grow their business.