Product Staging 101: Easy Product Photography for eCommerce
Whether you’re an entrepreneur selling on Etsy, DePop, Poshmark, thredUP, eBay, Amazon, or have your own Shopify page, you need high-quality product photos that showcase your products in an appealing way that makes people want to buy them.
As an ecommerce seller, you only have one chance to make a first impression that shouts quality and personality. Taking the time to stage your products is a simple way to do both.
The good news is you don’t need a pricy DSLR camera or a photography studio to stage and shoot gorgeous, professional-looking product photos that drive sales.
All you need is a mobile phone with a decent camera, a bit of creativity, a willingness to learn and experiment, and an app like Pixelcut for quick, no-fuss photo editing.
What Exactly Is Product Staging?
Staging is to product photography what set dressing is to filmmaking (or theatre productions). Product staging involves setting up your product to look as appealing as possible to potential buyers. It often involves using props or settings that help shoppers to imagine the product in their own life, like posing products with associated items or shooting the product in the environment in which it will likely be used. Products can also be staged after the fact by using photo editing software to remove the background and superimpose your product onto a different background.
Staging can really bring your product photos to life by giving your product personality and sparking emotional associations. Setting the vibe helps to create a relationship between the customer and your product or brand, which makes them more likely to buy.
Well-staged product photos help your products stand out in the sea of boring and amateurish product photos, and professional-looking photos suggest to shoppers that if you care about quality photos, you likely care about the quality of your product.
Key Things to Consider When Planning Your Photoshoot
Planning a photoshoot doesn’t have to be complicated, but there are a few things you should think about as you prepare to take your product photos.
Here are some questions to ask yourself to help you get inspired:
What are you selling? Certain product photography styles are more suited to certain kinds of products.
How will the product photo be used? Is it for an ecommerce store, an ad, or a social media post?
Which platform are you selling on? What are their requirements?
Which types of product shots perform well on your intended platform?
Who’s your audience? What other interests do they have that you could reference or use to theme your shoot?
What style(s) of product photography will you use?
Some product photography styles to consider include:
Plain white background, color, or textured background
Or a combination of two or more of these styles.
If you’re not married to a specific style or bound by a specific platform’s photography guidelines or requirements, consider experimenting with different styles for the same product to see which ones (or which type of background) convert better.
Product Staging Tips
Below, we’ve broken up our product staging tips into four categories, namely photography tips, background/backdrop tips, theme and prop tips, and lighting tips.
Product Photography Tips
Don’t let anyone tell you that you need an expensive DSLR camera to take great product photos. If you’re running a small business, focus on your making it profitable before investing in expensive gear. If you do have a schmancy camera, we won’t hold it against you, but anyone with a halfway decent phone camera can take professional-looking product photos if they’re willing to put in a bit of effort.
Here are some tips to help you take better product photos:
Use a tripod. Whether you’re shooting with a fancy camera or your iPhone, using a tripod will help you take crystal clear photos every time. This is especially important when using a slow shutter speed to let in more light, as any movement—hello, shaky hands!—will cause slight blurring.
Shoot on a stable table or stand that you can move around easily to capture photos from different angles, adjust lighting, etc.
Shoot close-up photos. If you shoot from too far away, you’ll need to enlarge your image, which can mess with your image quality.
Don’t hesitate to take tons of photos. The more pics you shoot, the higher the likelihood that at least one of them will be a banger.
If you’re using a camera, set it to the lowest aperture and ISO you can to let in lots of light and get a crisp, focused image while minimizing “noise”.
Don’t use your flash! We’ll talk about lighting in more detail below, but trust us—your photos will look better if you control your lighting source.
If you are using a fancy camera, set your file type to RAW to capture the highest quality photos. Don’t worry about the image size—you’ll convert it to jpg before you upload it.
If you’re fortunate enough to have professional studio lighting at your disposal, set your white balance to the same Kelvin temperature as your studio lights.
Background and Backdrop Tips
The background or backdrop can make or break your product photo. There’s nothing that makes a ecommerce catalogs look unprofessional as fast as a crappy, unstaged background full of clutter or other distractions.
A plain white backdrop is often the best choice for easy-to-achieve, professional-looking product photos. Removing distracting background objects helps to focus attention on your product. To get this effect, you can either shoot against a plain white background or use photo editing software to remove the background.
For white backgrounds, don’t just use a white wall, use a sweep. A sweep is a white backdrop that covers both the vertical background and the horizontal surface you’re shooting on to hide imperfections and textures that catch the light and make your photos look shoddy. You can make a simple DIY sweep using a roll of white paper.
If you’re going for a lifestyle or contextual look, try to match your background to the product’s function and the setting in which it’s likely to be used. For instance, you might shoot your artisanal coffee beans against a tile kitchen backsplash or a hipster butcher block and stage it with other coffee-related paraphernalia to make it look like it was taken in a coffee shop.
An art print should be shown on a wall, in a frame, with some decorative touches like plants, couches, tables, or other art to help potential buyers visualize the product in their own homes. You don’t need to rush to buy a new couch or potplant to stage it and shoot it yourself though! You can edit your photo into a frame mockup in a couple of seconds.
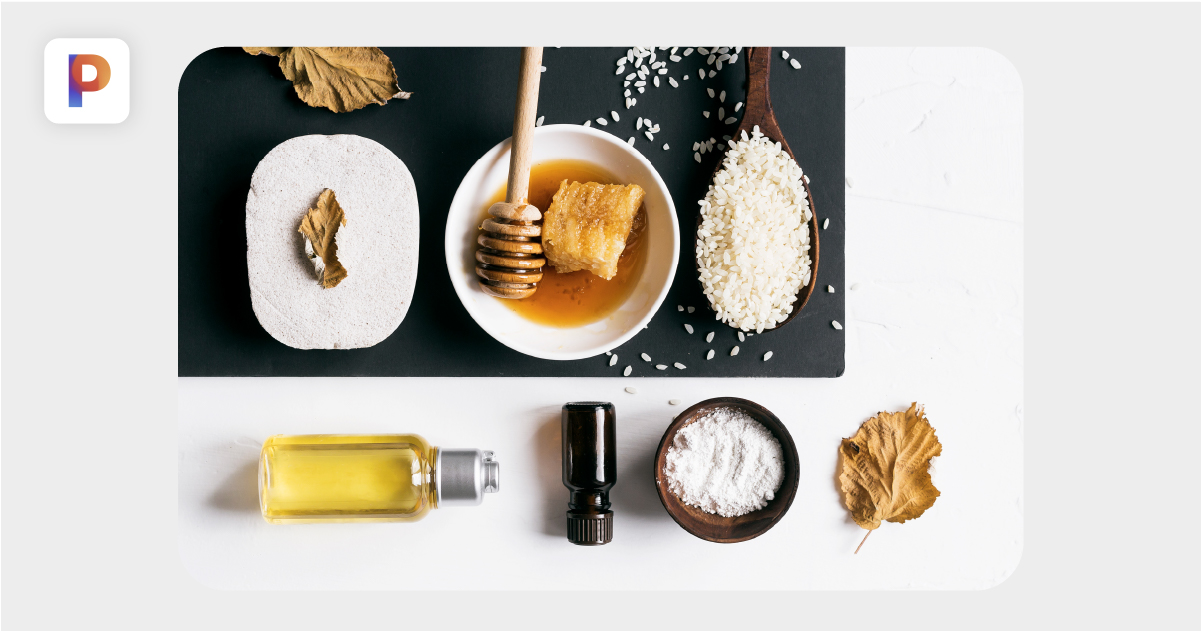
Get creative with texture. Marble, woodgrain, concrete, fabric—there are plenty of options to choose from to add subtle but interesting details to your photos. And if you don’t have a gorgeous marble countertop or butcherblock to shoot on, fake it with a piece of printed vinyl or contact adhesive—or print your own!
Play around with layering different items and textures to create depth in your photo. Whether it’s using a pretty tea towel in your kitchen shot or combining props with a printed backdrop, don’t be afraid to get creative when staging your photos.
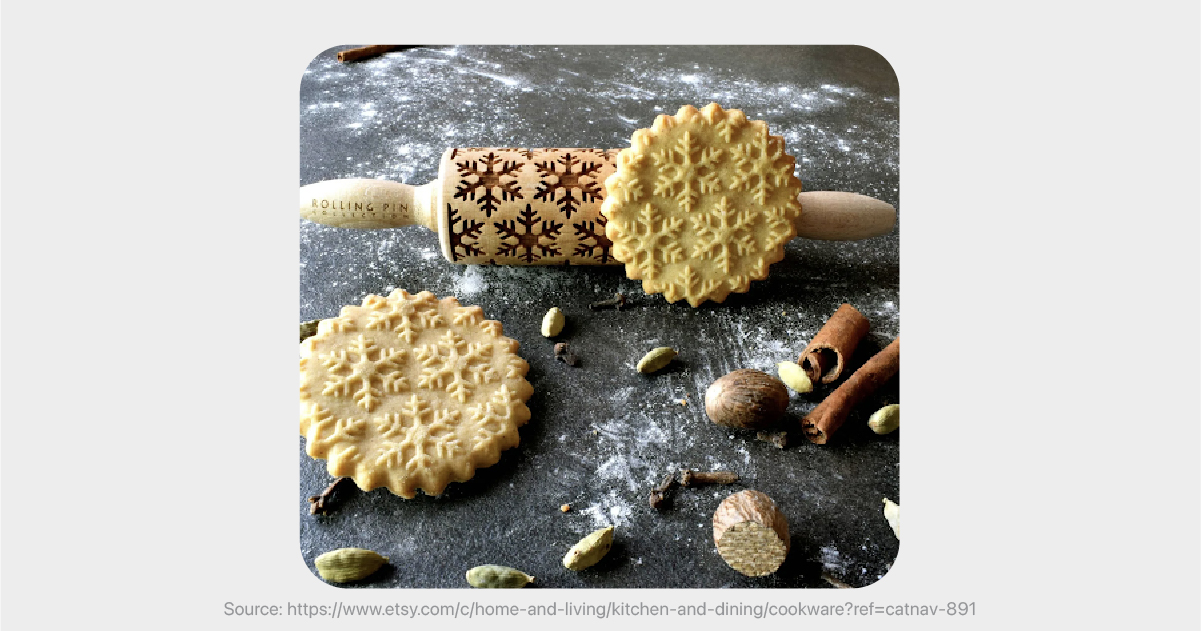
You can add a lot of subtle detail to your product photos by scattering a contextually-relevant substance around your product. This works particularly well in food photography. Examples include coffee grounds, tea, sand, spices, glitter, leaves, flower petals—or flour, like in the example below.
Use repetition to your advantage. If you want to stage an interesting photo but don’t have any interesting props or backdrops on hand, use a few of the same products to create an interesting composition.
Check out this product photography YouTube video for product staging inspiration. In it, photographer Peter McKinnon builds a layered set for the product he’s photographing—a deck of Star Wars-themed playing cards—using a printed backdrop and some metallic items from the Dollar Store.
For flat lay photography, don’t go overboard with props and extras, as this can distract the viewer’s focus from the product, or even make it hard to figure out what the actual product is! Keep it simple and make sure that it’s clear what the subject of your photo is.
Theme and Prop Tips
Be consistent. The first rule of product staging for your website or ecommerce marketplace is to ensure that all your photos look professional and remain consistent. A website or shop filled with photos with crappy backgrounds and dim lighting looks sloppy and amateurish.
Keep it simple. It can be tempting to add a ton of details to make your shot more interesting, but if there’s too much going on in the picture, it can distract attention away from your product. Keep it clean and simple to draw shoppers’ eyes to your product.
Raid your local antique stores, thrift stores, and Dollar Stores for props and inspiration. You might be surprised by the gems you can find that can add character and life to your product photos for just a few bucks.
Peter McKinnon is a pro at using junk from antique stores to stage product photos with tons of character. Source: YouTube
If the product comes in beautiful, premium packaging or packaging that conveys important information, consider taking a couple of shots that include the packaging.
Consider including familiar items in your photos to show the product’s scale, especially if it’s an item where size is an important product detail that could result in complaints from customers that didn’t read the product specs.
Lighting Tips
You don’t need professional studio lights to take great product shots. With a bit of creativity and a lot of tape, you can MacGyver a pretty decent lighting setup.
There are tons of photography lighting hacks tutorials on YouTube to help you improvise a pro-looking lighting setup—on a budget. To be honest, it won’t look pro, but your photos will!
You could even build your own lightbox, like in the photo below.
Use more than one light source. Familiarize yourself with the concepts of key lights and fill lights and experiment with the effects that different lighting placements have on your image clarity and shadow quality.
Soften your light to avoid harsh glare and dark shadows. Diffuse or reflect your light source using a wall, a bounce card (or piece of white cardboard or foamboard), an umbrella, a plastic bag, a white bedsheet, or, a curtain—basically whatever you have on hand or can get hold of cheaply.
Light your product but don’t light the surface your product is resting on, as you want to focus all attention on the product itself, and the surface should be sufficiently lit by reflected light.
Take advantage of natural light, which simply refers to sunlight. You can do this by shooting outside—a good option if you’re photographing a model or a product that will be used outside—or by shooting indoors near a window.
If you want to get really creative, attach sheets of colored plastic to light sources using tape or clamps to create DIY gels that give your photo a colored tint.
Perfecting the Look: Edit Your Photos
For really gorgeous product photography, you’ll need a solid editing tool.
Photo editing tools can help you to create professional-looking photos by giving you a way to easily remove and replace the background, remove distracting elements, adjust settings like exposure and saturation, and much more.
Editing tools that offer templates or let you create your own can also be a huge time saver when it comes to uploading products to ecommerce platforms that have specific photo guidelines and sizing requirements—especially if you’re selling through multiple platforms.
The good news is that you don’t need to fork out a ton of money and spend countless hours figuring out how to use Adobe Photoshop. There are many great photo editing tools available, including mobile apps like Pixelcut, which allows you to edit and upload your product photos in just a few seconds!
Enter Pixelcut
Pixelcut is a must-have app for all ecommerce sellers, no matter what platform they use.
It’s the best mobile app available for accurate background removal, using advanced AI to do the hard work for you. It also offers a great range of professional templates and useful editing tools to take your product shots to the next level.
Pixelcut features an impressive range of backgrounds, templates, and collage tools that make it easy to create hot, professional designs for ecommerce stores and social media.
Don’t have cool backgrounds to stage your products in? No problem! Pixelcut has a huge library of product staging templates you can edit your products into, including veined marble, beautiful wood grains, color gradients, and themed holiday backdrops, to name just a few.
Here are a few more of the exciting things Pixelcut lets you do:
Add shadows to make your edited photos look more realistic and striking
Apply templates to keep up with the latest TikTok and Instagram trends
Create and save brand kit to reuse color palettes, fonts, etc. to dramatically speed up your content creation process
Use saved settings to batch-edit photos
Resize your photos for a specific platform or ecommerce platform with a single tap
The Pixelcut app is free to download and offers a 3-day free trial with tons of free templates and resources on offer.